Thursday, December 15, 2016

A Gift in a Jar: Butterscotch Brownies

 
I hope you all are having a nice slow and cozy Advent and holiday season so far. I know these short days can be so hectic and not so cheery to many, and please know that I am thinking of you. I have learned over the past few years, this season, although filled with pretty lights, sweet gifts, and yummy treats, is most importantly a season of preparation and stillness. Remembering our sweet Savior's first coming into the world as a baby in a manger and preparing our souls for when He comes again. Thinking of Jesus' Earthly life is so comforting to me because it reminds me that he gets me. He fully understands the trials we are going through, and He is right by our sides, through every painful and every joyous moment.  I hope that thought comforts you too, and allows us all to be grateful for Him first, send extra love to others second, and soak in all the wonderful magical things this season brings third. 

In the spirit of Christmas and gift giving, I wanted to share a homemade project with you this year that you can cozy up indoors and make for your loved one.  It's a simple brownie mix that you could gift on it's own or pair it with an oven mitt for a little gift set that is sure to warm the heart and the belly. I paired my brownie mix with the oven mitt I designed for my crochet class on Skillshare. If you may be interested in making this little mitt, you can head over to my class to see how it's done. If you are already a crocheter, feel free to just download the pattern or skip over to the project videos.

I love using natural and simple materials when I create things whether it's gifts or just a little something for myself. I think it offers a peaceful and warm feel made with intention. I chose to use simple ingredients for the brownie mix that you most likely have on hand, and my oven mitt was made with pure American wool. For the wrapping, I used a natural linen fabric, a bit of twine, and a tree clipping. I very much hope you enjoy making this gift and gifting it! 
Brownie Mix:

1 1/4 cup flour
2 cups sugar
2/3 cup cocoa powder
pinch of salt
butterscotch morsels

Mix all brownie ingredients in a bowl with a handful of the butterscotch morsels. Slowly add the mix into a 1 quart mason jar pressing down the mix firmly into the jar as you go. I used the bottom of a small glass for this. Add another handful of morsels to top the jar off and close. Print out this label and add to the top of the jar. Place the oven mitt on top of the fabric, then the jar in the center of the oven mitt standing up. Gather the four corners of the fabric at the top of the jar and securing with the twine. Decorate with your tree clipping. 

Wednesday, November 30, 2016

Essential Crochet Basics Class for Skillshare


A few months back, I was contacted by Skillshare to see if I would be interested in creating a course for their platform. If you aren't familiar with Skillshare, they are an online learning community with tons of wonderful classes on a wide range of topics. I actually learned to knit by taking a Skillshare class in 2014, and talked about my experience in this post.  I was a bit hesitant at first, because I am quite a shy person. Throughout school, and even now, I would DREAD presentations, as I tended to sound as if I were running a marathon while giving my public speech. My husband, being the most incredibly supportive person he is, ended up convincing me to give it a try. Creating this class was no small feat for me. Not only am I camera shy, I am not so great with technology either, so the filming and editing portions of this class were a learning curve for me. That said, I LOVED designing this project and sharing my skills in this class. I don't know how people learned much of anything without the internet. The majority of my crochet skills were learned through kind people sharing their knowledge online. So although I feel uncouth as a teacher, I do hope this class can help others who are interested in this craft.

This class is brimming with basic crochet techniques including how to get started, basic stitches, and finishing techniques. You will learn how to crochet in rows and rounds. And you will walk away with the cutest oven-mitt to gift or keep for yourself. It is an intensive beginner class, but I wanted to teach all of the core crochet techniques that makeup most crochet patterns that students can come back to and reference as they work through other crochet projects.

So if you are interested in learning this craft, or if you are already a fellow crocheter and simply want to make the oven mitt class project, you can enroll in the class by following this link. The first 25 students can enroll at no cost. I really hope you enjoy the class!

Thursday, November 10, 2016

Rosemary Satsuma Fizz

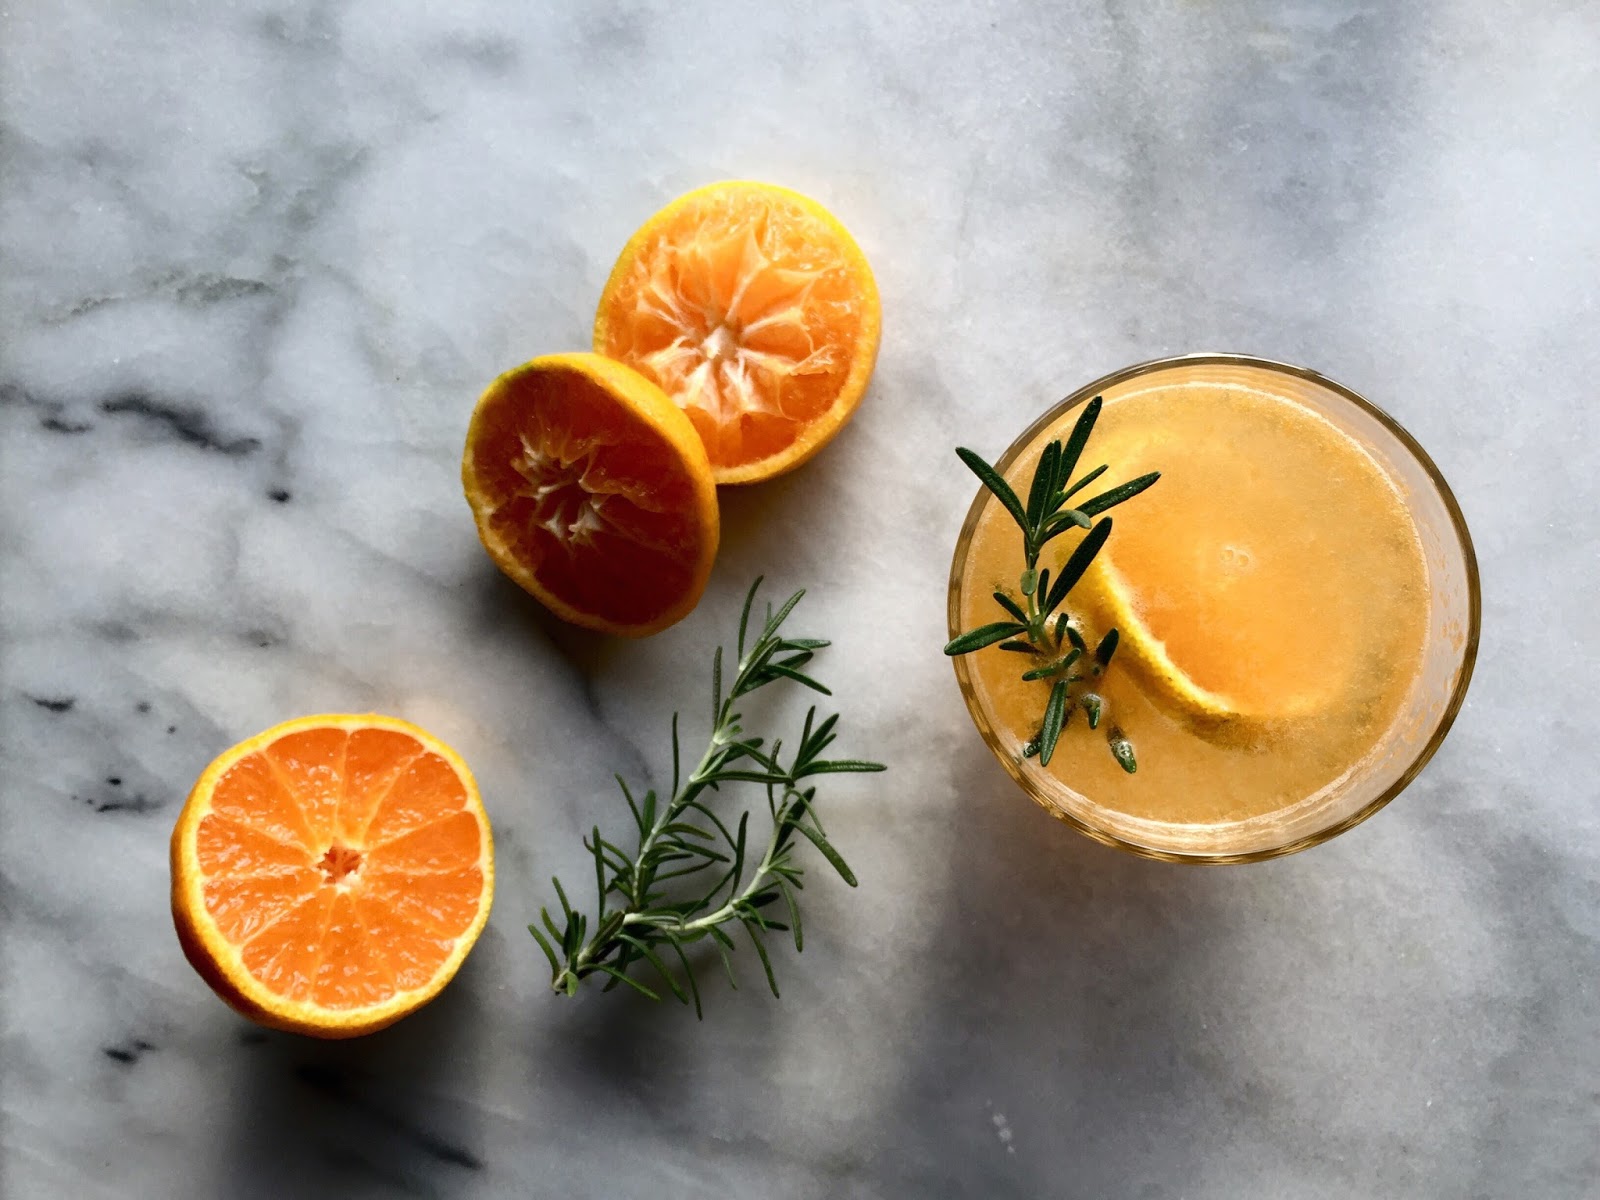
This time of year in Louisiana, it is quite easy to spot an overfilled satsuma tree with its fruit weighing down its branches on a quiet street corner or neighborhood yard. When we moved into our house last year, we were so happy to find our very own baby satsuma tree growing in the backyard. Our satsumas are still ripening, but luckily there are plenty of this delicious little fall citrus to go around down here, so I get them in bag fulls from friends and family. I love a good gin fizz, so I thought I would substitute the lemon juice for satsuma juice and add in a hint of rosemary, which I also have growing wildly. It turned out so refreshing, but still tasted like fall. I hope you enjoy!

 Rosemary Simple Syrup

1 cup sugar
1 cup water
5-6 sprigs of fresh rosemary

Simmer sugar and water together in a sauce pan and stir until all the sugar has dissolved. Add the rosemary and simmer for about 5 minutes. Remove from heat and let it stand for about 10 minutes before removing the rosemary.

Rosemary Satsuma Fizz

1 oz gin
2 oz fresh satsuma juice
2 teaspoons rosemary simple syrup
sparkling water or club soda

Combine the gin, satsuma juice, and rosemary simple syrup into a cocktail shaker or mason jar with some ice and shake well. Pour the liquid into a cocktail glass and top with sparkling water or club soda. Garnish with a slice of fresh satsuma and rosemary.


Wednesday, November 9, 2016

Indigo Girls


After swooning over natural dyes for years (especially recently after this gem of a book was released) I finally stirred up a vat of indigo to play with. My very best friend and I spent a whole day experimenting with different patterns and designs on flour sacks, canvas bags, silk scarves, and of course yarn! I must say, my little fiber and textile loving heart was so full and happy.

Friday, September 16, 2016

Little Things


The Little Things posts are links to a few things I am loving lately. A good day revolves around good and happy moments, gratefulness, and  sometimes delighting in little things that make your heart smile. I hope these links bring a little joy to your day, too. 

A glad heart is excellent medicine.
Proverbs 17:22

I have never taken a Craftsy class before, but all of their bread classes are sure enticing.

This quote by Robert A. Ward is one of the most loveliest things I have ever read.

Brooklyn Tweed released their Fall collection this week, and I am swooning over the His and Hers heme. My favorites are the Auster design for him and the Spearheads design for her.

Another design released this week is Tavia, the sweetest most elegant and romantic knit skirt you could imagine. I already have an extra skein of Finch in this colorway, so I may just be casting on ANOTHER project this weekend.

This pan-fried fish recipe has been cooked for supper several times in the last few months at my house. It is simple and fresh and delicious. I highly reccomend!

I've added this rosewater facial spray to my daily routine after I apply my moisturizer in the morning and evenings and I love how fresh and clean it makes my skin feel!

Image via.

Thursday, August 25, 2016

Five Feet High and Rising


How high's the water, mama?
Two feet high and risin'
How high's the water, papa?
She said it's two feet high and risin'

We can make it to the road in a homemade boat
That's the only thing we got left that'll float
It's already over all the wheat and oats,
Two feet high and risin'
- Johnny Cash

We awoke to gray skies and muddy water inching in quickly from Bayou Manchac to the North and our creek to the south. It didn't come as any surprise that the creek had flooded, and in fact we had stocked up on groceries knowing we may be stuck on our side of the road for several days. It's when I stepped out onto the back porch and realized I could go fishing right off the edge into my backyard that I started to worry a bit. He advised me to use what water I needed and fill up the bath-tubs because he was shutting off the water pump before it became inundated. As i was filling up the kettle to make us coffee (because clearly my priorities were sound), he came in and decided we should quickly pack a bag and get out while we could. So, we and our dogs boarded a kind neighbor's pirogue and floated through our flooded little  street as our magnolia blooms waved us farewell. 

We didn't return until five days later, in another small kayak that a wonderfully nice stranger let us borrow. By the grace of God, our tiny blue house managed to stay dry. Out of the flood waters in the backyard, one little zinnia from my garden stuck through and I wanted to cry out of happiness and exhaustion. It is a bitter-sweet thought to know your home is safe, while your friends and family and community have lost so much. These days have been emotionally and physically taxing. We have spilled blood, sweat (so much sweat), and tears because of this flood. We have laughed and cried and hugged. Everyone is doing what they can to help, and through this devastation, it's so nice to be reminded how loving and kind our community is. I'm so proud to be a part of it. Stay strong my sweet sweet Louisianians. And to you non-locals, please keep us in your thoughts and prayers as we slowly but surely rebuild our home.

Wednesday, August 10, 2016

Deveraux Tank

I had the best summers growing up, and I love to reminisce and think about those hot sticky days when the non-existent phrase of my current lifestyle "I'm bored" was so easily tossed around. How wonderful it would be to be bored again. To pass the time, we would fill up our super soaker water guns and the wars would commence! Truces would be declared at the first sound of the ice-cream truck on our street. We would hurry to beg Mawmaw for ice-cream money, and then run as fast as we could to catch him before the music faded. Mawmaw and I would always get the fudgsicles, and I would happily sit drenched from our water gun fights and eat my cool delicious treat. Some days, Mawmaw and Pawpaw would bring us to our aunt's house, and we would swim until dusk only breaking for sustenance and the reapplication of our sunscreen. Other days, we would go fishing at various ponds and rivers and lakes, and Pawpaw taught us how to properly bait a hook with crickets and worms. You have to do it just so, or the bait will squirm off or the fish will nibble it right off your hook before you get the chance to set it. We would have fish fries in the afternoon with our day's bounty, and if we happened to not catch enough to feed the family, Mawmaw would run to the local Winn-Dixie to buy more. We had many lazy wonderful summer days, and I have mainly my grandparents to thank for that. So this design is dedicated to them, and all the wonderful summer memories they gave me. 
The Deveraux Tank is a sweet airy top made with Purl Soho's Linen Quill yarn. Linen Quill is a new Purl yarn, and I must admit, I was infatuated as soon as I saw it. I hurriedly purchased three skeins to experiment with, and this tank is what resulted. It was such a pleasure to work with, and has a wonderful drape about it with an ever so slight halo. And OH THE COLORS. So many beautiful colors to pick from (which they just so happen to have restocked!). 

Deveraux is worked in single crochet stitches with a split ribbed hem. The bust and straps are worked first, then the yarn is reattached to the bottom, and the piece is finished working down to the ribbed hem. The tank is worked in the round, so the only seaming is a few stitches to connect the straps at the top. I love the fit of the tank and how the fiber gets softer and more comfortable with each wear.

The approximate size of this tank is a medium (36-38" bust), however if you need to make it larger or smaller, simply adjust the foundation chain row by about 20 chains per size. You can find this pattern on Ravelry here.  I really hope you enjoy making and wearing this piece often. As always, please feel free to contact me with any questions! Also, a huge thanks to my beautiful dear friend Elizabeth for modeling.  

DEVERAUX TANK
Designed by Ashlyn Holmes

YARN
Purl Soho Linen Quill
50% Fine Highland Wool, 35% Alpaca, and 15% Linen
439 yards / 410 meters per 100 gram skein
2-3 skeins


FINISHED GAUGE
28 stitches and 22 rows = 4” in single crochet stitch

HOOK
·         3.5 mm

NOTIONS
·         tapestry needle

·         scissors

FINISHING
Weave in ends, and wet block 

PATTERN                
Bust
Chain (ch) 200 and join your yarn to the first ch made with a slip stitch (ss) being careful not to twist. Single crochet (sc) in each ch around. Sc into the first sc made, do not join. Continue to sc around until piece measures 9.5 inches long.

Straps (worked in rows)
Row 1: With your yarn still attached to the bust piece, sc in the next 20 stitches. Turn and ch1.
Rows 2-9: Sc in each sc across. Turn and ch 1.
Row 10: sc decrease (dec) in next 2 sc. Sc across to last 2 sc. Sc dec in last 2 sc. Turn and ch 1. (18 stitches)
Rows 11-13: Sc in each sc aross. Turn and ch 1.
Row 14: Repeat row 10. (16 stitches)
Rows 15-17: Sc in each sc across. Turn and ch 1.
Row 18: Repeat row 10. (14 stitches)
Rows 19-21: Sc in each sc across. Turn and ch 1.
Row 22: Repeat row 10. (12 stitches)
Rows 23-25: Sc in each sc across. Turn and ch 1.
Row 26: Repeat row 10. (10 stitches)
Rows 27-39: Sc in each sc across. Turn and ch 1.
Row 40: Repeat row 10. (8 stitches)
Rows 41-54: Sc in each sc across. Turn and ch 1.
Row 55: Sc in each sc across. Fasten off and weave in end.

Attach yarn 34 stitches over from the end of the first strap and repeat rows 1-55.
Attach yarn 26 stitches over from the end of the second strap and repeat rows 1-55.
Attach yarn 34 stitches over from the third strap and repeat rows 1-55.
Line up the tops of your straps and seam together. 

Attach yarn to any stitch on the neckband of the tank top, and sc around 3 times, doing a sc dec at the corners of the neckband each round to round out the neckband.

Attach yarn to any stitch on one armhole and sc around 3 times, doing a sc dc at the corners where the straps and tank meet to round it out. Repeat on other armhole. 

Waist
Attach your yarn to any ch stitch at the bottom of your tank. Sc in first ch stitch and in each around. Do not join. sc around making two sc increases (inc) in each round until you have added 20 additional stitches to your tank.  

Once the increases have been completed, continue to sc in the round without joining until your tank top length measures 23 inches, or your desired length. 

Hem (worked in rows)
Row 1: With your yarn still attached, half-double crochet (hdc) in the next 110 stitches. Turn and ch 1.
Row 2: (Front-post hdc (fphdc) into the next hdc, back-post hdc (bphdc) into the next hdc) repeat across. Turn and ch 1.
Row 3: (bphdc into the next hdc, fphdc into the next hdc) repeat around. Turn and ch 1.
Rows 4-6: Repeat rows 2 and 3. Fasten off and weave in end.

Attach yarn to the sc stitch directly next to the end of the front hem row with the right side facing.

Row 1: Hdc in the next 110 stitches. Turn and ch 1.
Row 2: (Fphdc into the next hdc, bphdc into the next hdc) repeat across. Turn and ch 1.
Row 3: (Bphdc into the next hdc, fphdc into the next hdc) repeat around. Turn and ch 1.
Rows 4-10: Repeat rows 2 and 3. Fasten off and weave in end.

Tuesday, June 21, 2016

Garden Tomato Galette


"Summer was our best season: it was sleeping on the 
back screened porch in cots, or trying to sleep in the
tree house; summer was everything good to eat; it was 
a thousand colors in a parched landscape..."
-Harper Lee


Growing up, the only part of my diet consisting of tomatoes were of liquid form. Ketchup and spaghetti sauce sums up my interaction with tomatoes as a child. Slowly over the years, I've come to appreciate them. They are so forgiving of new gardeners, growing so easily and making you feel accomplished. The smell and beauty of a fresh tomato with it's little specks of brown dirt and plump fleshy skin is unlike any other. And the wonderful feel-good taste you can only truly appreciate right in the heat of summer, with rosy cheeks and tanned skin. Our little tomato plants have been good to us this year. After spending the evening in the yard, this little galette is a simple and delicious summer supper. 

Ingredients

3 creole tomatoes
1 sheet of puff pastry
1/4 cup goat cheese
1/4 cup grated Romano cheese
Fresh thyme
1-2 TBSP olive oil
salt
freshly ground pepper

1. Roll out the puff pastry sheet and place on a greased baking pan.
2. Slice your tomatoes and arrange them in a single layer in the center of the puff pastry leaving about an inch on all sides.
3. Drizzle the tomatoes with olive oil and salt and pepper them.
4. Remove leaves from a few sprigs of thyme and sprinkle over tomatoes, and add a few sprigs of thyme in tact to the top as well.
5. Sprinkle the cheese on top, and then fold in the edges.
6. Bake at 400°F for about 20 minutes.


Monday, June 20, 2016

Linen Grand Isle


Another version of my Grand Isle Cowl in Quince and Co's Sparrow. This linen is BEAUTIFUL and the perfect fiber for summer. I used two skeins of Sparrow, and it was just enough to finish the cowl. This version has much more drape than it's silk/wool twin, and I love it. I've already worn it several times in the past week, and I know this will be a summer staple for me. 

Tuesday, May 31, 2016

Goat Cheese Omelettes with Sun-dried Tomato Spread

I hope everyone had a good Memorial Day Weekend! I am so grateful for all who serve and especially those who have lost their lives or loved ones. My heart aches for the families who are separated, and I pray all of your loved ones make it home safely to you. I spent the weekend with family and friends, mostly over meals. A lot of BBQ and SO much watermelon. On Saturday morning we had a few friends over for brunch at our house, and I served some simple goat cheese omelettes with sun-dried tomato spread alongside fresh zucchini bread. Perfect for summer weekend mornings.

Ingredients:

Eggs
Goat Cheese
Salt + Pepper
Jar of Sun-dried Tomatoes

To Make:

1. Whisk 2 eggs together in a small bowl, and add 2 tablespoons of water and salt and pepper.
2. Pour into a medium sized skillet and cook until just about done, lifting the edges and draining the liquid egg to the bottom of the omelette as it cooks.
3. When the omelette is almost done, add about a handful of goat cheese to one half of the omelette and fold the other half on top. Cook for about 30 seconds, flip and cook an additional 30 seconds. Remove from heat and serve.
4. For the tomato spread, simply add the jar of sun-dried tomatoes with the oil to a food processor and blend until the tomatoes are very fine. Top your omelettes and enjoy!

If you are making multiple omelettes, and need to keep them warmed, heat oven to 200°F and place cooked omelettes in an oven safe dish with a damp paper towel on top.

Friday, May 27, 2016

Grand Isle

I am over the moon to share that the Grand Isle pattern I designed for Quince and Co. is now available! Quince yarns are some of my favorite, and I have peace of mind using their yarns knowing they were made ethically and with so much love. This week, they dedicated the whole week to just crochet designs, and I love them even more for that. Crochet doesn't get a lot of love in the fiber community, which makes me glum sometimes being that crochet is part of my soul. I think people don't see the beautiful and modern designs that can be created using crochet, and I am honored to be able to share one of my very own creations. This design is perfect for all levels of crocheters, even ones who have never picked up a hook before. If that's the case, I hope this can be your first, and that you get hooked, because crochet really is a wonderful, relevant, therapeutic, feel-good centuries old craft that is certainly not lost. Head over to the Quince Blog for more about Grand Isle and to see the other lovely patterns from Crochet Week!

All photos by Quince and Co.

Wednesday, May 25, 2016

Warm Weather Lists


I've pulled all the lettuce out of my garden, and in their place I have dinner plate dahlias sprouting up. We finally built a stand to hang our beautiful handmade cypress swing that my uncle built, and the majority of our afternoons are spent on our swing, watching our garden grow, sipping iced coffee, and talking or reading in peaceful silence. These recent warm weather days have been SO good, and I look forward to what this season will bring. I have a lot of warm weather recipes and crochet projects I've been thinking about and even more books on my summer reading list, so I thought I'd share them in case anyone is in need of some warm-weather inspiration. In case you haven't noticed, I am a big list maker. Here's to all you other overly organized list makers out there!

Recipes

Fried Green Tomatoes with Buttermilk-Feta Dressing because the little green tomatoes in my garden have my mouth watering and I can't wait until they ripen to pick them.

Whole Wheat Milk and Honey Sandwich Bread for summer picnics and weekend lunches on the back porch.

Skillet Peach Cobbler served with buttery vanilla ice-cream for my summertime sweet tooth and cast-iron skillet obsession. 

The Coffee Ice Cube Latte for the poor coffee that was destined for the drain and lazy afternoon pick-me ups. 

Bourbon + Spiced Pear Cocktail for when our pears have ripened and are ready to pick.

Books

Carrie Pilby by Caren Lissner - I am about half way through this one, and it is delightfully witty and wonderful. 

Modern Lovers by Emma Straub - I adored her first novel The Vacationers and am excited to read her newest book.

All The Light We Cannot See by Anthony Doerr - My husband says I'll love it and probably cry a good bit too... 

The Glass Castle by Jeanette Walls - A true story of a girl who rose from a dysfunctional family and nomadic lifestyle to become a successful kind woman with no resentment and so much love in her heart. 

The Inimitable Jeeves by P.G. Wodehouse - A classic author that has been on my list for awhile. 

Fiber Projects

A crochet version of the Slope Tank in Purl's new Linen Quill

A simple version of the Hannah Tee with no lacework in the back in a nude pink

Wool and the Gang's Off The Wall Hanging 

A crochet version of this tote using cotton yarn and some camel handles that I've been saving for something special

This comfy ribbed shrug in a neutral colorway


Thursday, April 28, 2016

Crochet Wall Hanging Tutorial

I found this amazing dishcloth pattern on Knit Picks' website, and wanted to make it for my sweet best friend for a housewarming gift. When I showed her the picture of the design, she kindly told me that I was crazy if I thought she would use it as a dishcloth. So I turned it into a wall hanging for her and am so delighted in how it turned out. This was my first tapestry crochet project, and I have no idea why I've never tried it before! I'm quite addicted now, and can't stop browsing patterns or dreaming up some of my own. So if you know of any good tapestry crochet resources, send them over please!

Materials

Some sort of stick (I used one out the yard, but you could purchase a dowel rod from a local craft store)
Worsted weight yarn in 2 colors of your choice
5mm crochet hook (or whichever hook works best for your yarn)
Tapestry needle
Scissors

Note that the weight of your yarn and size of your hook will determine the size of your hanging. The original dishcloth pattern calls for a worsted weight yarn and 4mm crochet hook and the final measurements were 8" x 11". I used a heavy worsted with a 5mm hook, and mine turned out slightly bigger.

Instructions

Follow the pattern as instructed, finish off, and weave in all ends. In order for your work to look correct on the Right Side, you will need to insert your hook from the back to the front on the Wrong Side row stitches.

Make about 12 4" tassels and attach them to every other stitch on the last row of your work.

Using a tapestry needle, attach the top of your work to your stick by inserting the tapestry needle into the first top stitch and around the stick and then working your way across the top row. Leave enough access yarn at the and to attach to the opposite side of the work so you can hang it.


Friday, April 22, 2016

Little Things

The Little Things posts are links to a few things I am loving lately. A good day revolves around good and happy moments, gratefulness, and  sometimes delighting in little things that make your heart smile. I hope these links bring a little joy to your day, too. 

A glad heart is excellent medicine.
Proverbs 17:22

This album was released recently and I've listened to the whole thing once a day for the past few weeks. SO good!

Jersey Ice Cream Company is an interior design company that creates the most beautiful inspiring homey places I've ever seen. If I ever win the lottery, these guys will be remodeling my entire home. They work pure magic I tell you!

A few gentle reminders to better yourself and be more kind. 

I have been reading this book that my MIL gave me in the mornings with my breakfast, and it has made such a difference in how I start my day. Beautiful stories about mercy, loving, and serving. 

My birthday is this weekend, and I am tempted to make this cake for myself. I adore Marte Forsberg's taste in food, style, and pretty much everything. 


Monday, April 18, 2016

Crochet Apron Tutorial

A few months ago, I bought some  vintage cotton yarn from an outdoor flea market in the city. It was an unexpected impulse buy that I am so happy I indulged in. At first, I had planned to make a cotton tote with the yarn and use a pair of beautiful camel handles I've been saving. Then I had this idea of a simple half apron, and I knew that was what this yarn was destined for. I love how this project turned out, and as soon as I was finished making it, I promptly put it on and went to the kitchen to bake. You know, the obvious thing to do to break in a new apron is powder it with puffs of flour and sugar. Have I mentioned I am a messy baker? Really if I'm honest, the messiest baker. Since I wouldn't really call this a pattern as all it consists of are rows of single stitch, I thought I'd write down the easy instructions if anyone was interested in making one. I hope you enjoy! And if you happen to wonder whether you should make this apron because you already have a zillion aprons, let me give a small bit of advice: You can never have too many aprons.

Materials:
Approximately 600 yards of heavy worsted cotton (linen would be lovely too!!)
5mm hook
twill tape
tapestry needle
scissors

1. ch 63 (or until your chain is about 20 inches wide)
2. sc in second ch from hook and in each across. turn ch 1.
3. sc across

Repeat row 3 until your apron measures approximately 18 inches long (or whatever length you prefer)

Finishing: Fasten off and weave in ends. Lay twill tape two rows down from one end, fold the top two rows over the tape and pin down. Using your yarn and tapestry needle, sew the apron together over the tape, so you can still adjust the apron strap once complete.

Finished measurements should be approximately 16x20 inches.

Friday, April 8, 2016

Little Things

The Little Things posts are links to a few things I am loving lately. A good day revolves around good and happy moments, gratefulness, and  sometimes delighting in little things that make your heart smile. I hope these links bring a little joy to your day, too. 

A glad heart is excellent medicine.
Proverbs 17:22

My latest obsession is Turkish pillows. I have a few on my wishlist for the living room.

This southern tea company grows and forages their own tea ingredients. I think I'll be trying this set out for making yummy iced afternoon tea to enjoy on the porch!

Purl Soho just released a new yarn, and I am swooning over the wool, alpaca, and linen blend and all the pretty colors it comes in! Definitely going to be purchasing some skeins to make a nice lightweight summer top.

A few healthy warm weather recipes I can't wait to try. 

I love this little mantra so much. 

I'm loving the new summer basics from Hackwith Design and this photo they posted on Instagram with their white denim maxi dress styled soo beautifully. 


Thursday, April 7, 2016

White Chocolate Raspberry Cupcakes

These cupcakes. They take forever to make, and your kitchen will look like sugar and icing and flour exploded everywhere when you are finished (maybe that's just me). But I promise, they are so so worth it. So much sugary goodness in these little pastries they are a surefire crowd-pleaser. These cupcakes also happen to be Trent's most favorite dessert I make. I hope they'll be your favorite too.

Base cupcake slightly adapted from this recipe, and filling and icing were inspired by this recipe.

Ingredients:

For the Cupcakes
2 1/2 cups flour
2 cups sugar
2 teaspoons baking soda
1/2 teaspoon salt
2 cups water
2/3 cup oil
1/4 teaspoon vanilla extract
2 tablespoons vinegar
white chocolate chips

For the Raspberry Filling
8 ounces fresh raspberries
1 tablespoon water
3 tablespoons sugar
8 ounces cream cheese softened

For the Icing
1 cup butter softened
1 teaspoon raspberry extract
3 cups powdered sugar
6 ounces white chocolate
1-2 tablespoons milk

Directions:

1.To make the cupcakes, line and spray a cupcake pan and preheat oven to 350°. Combine the flour, sugar, baking soda, and salt in a stand mixer and gently mix. In a medium bowl combine the water, oil, vanilla, and vinegar and whisk together. Add the wet ingredients to the dry ingredients and mix on medium for about 2 minutes. Pour the batter into the cupcake pan and add a small handful of white chocolate chips to each cupcake. Use the back of a spoon to sink the chips into the batter. Bake for 18-22 minutes until a knife inserted into the cupcake comes out clean.

2. To make the filling, add raspberries, water, and sugar to a food processor and pulse until pureed. Add raspberry mixture to a small saucepan and simmer for 5 minutes. Add raspberry mixture to stand mixer with the softened cream cheese and mix until fully incorporated.

3. For the icing, Add butter and raspberry extract to a stand mixer and beat until combined and fluffy. Add the powdered sugar 1/2 cup at a top until fully incorporated. Melt the bakers chocolate and add to the icing with 1-2 tablespoons of milk and mix together.

4. To assemble, once the cupcakes have cooled, use a butter knife to cut a small hole in the center of each cupcake. Use a piping bag to pipe a small amount of raspberry filling into each of the holes. Use a piping bag to pipe on the icing and top with a fresh raspberry.


Monday, April 4, 2016

A Cosy Cotton Tunic

I've filled my bird feeders and planted vegetables. I've pounced around with the dogs until the sun faded. I've sat on the porch, iced coffee in hand soaking in the glorious longer days. I LOVE these longer days and having more sunshine after work to spend outside. It's my favorite time of year. Luckily for me, I am a southern gal, which means I don't have to ever endure too much winter. I know some frown upon Louisiana's lack of seasons, but I am partial to the sunshine and sticky heat of the south. With the warmer days upon us, I think I finished this Rebekka Jumper just in the nick of time using the most soft and chunky cotton you could imagine! It is so airy and cosy, and I have a feeling I will be living in this piece for awhile.

Monday, March 7, 2016

His & Hers Handmade Socks

I know that His & Hers things are quite cheesy, buuutt I can't help but love them. Especially because I love the His to my Hers so much. I see several of our newlywed friends wearing the Hubby and Wifey tees and many poke fun. I adore those sweet cheesy t-shirts so much, because it shows the love and excitement you have for each other and how proud you are of your His or Her. It's extremely endearing to me. As for the socks, I have never crocheted socks before and decided I NEEDED handmade wool socks in my wardrobe ASAP. I also thought I should make my husband a pair, because for as much as I knit and crochet, for myself and others, I never seem to make him anything. I think this is largely due to him being a man, and I feel a lot of crocheted items that I make are for the most part feminine. Wool socks are universally needed by everyone, so I set off to make both of us a pair. Then, I found this cable sock pattern and decided they would be matching, because like I said earlier, matching couples things are endearing and I love them.

Friday, February 19, 2016

Little Things


The Little Things posts are links to a few things I am loving lately. A good day revolves around good and happy moments, gratefulness, and  sometimes delighting in little things that make your heart smile. I hope these links bring a little joy to your day, too. 

A glad heart is excellent medicine.
Proverbs 17:22

Really want to get good at making southern kitchen staples like yummy homemade biscuits. This recipe looks simple and tasty!

Love this pretty home and all the little homey details that fill it.

This store has the most STUNNING rugs I've ever seen, and I want them all!

Lovely apparel that assists families in need. 

Oh Jimmy, you are constantly splitting my sides. 

Image (via)